Japan’s prenatal system is excellent, if a bit more involved, process-driven, and tech-heavy than that in other countries.
At 38 weeks pregnant, I’ve so far attended 15 maternity appointments, including 12 scans. The good news is that, since I’m in full-time employment, costs are covered for the most part by the Japanese government’s health insurance scheme.
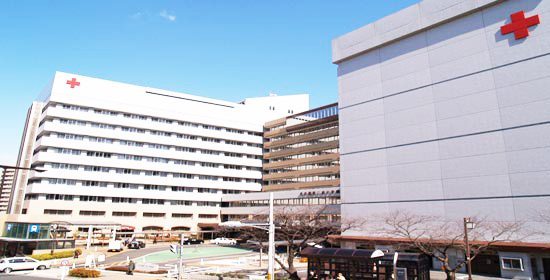
After my pregnancy was confirmed by a local doctor (at Hinokicho Women’s Clinic), I decided to attend appointments and register to give birth at Japan Red Cross Medical Centre (日本赤十字医学図書館 or “Nisseki” Hospital). Every time you visit Nisseki, there are sequential procedures to follow and, since it’s a big, general hospital, each appointment can take between 90 minutes to 3 hours.
Because of my limited Japanese language skills it’s taken me almost the entire length of my pregnancy to get to grips with some parts of the largely automated routine.
There are 7 main steps to follow.
Step 1. Check in
 On the first floor of the hospital, go to the check-in machines that look like big pink and white ATMs.
Put your hospital card into the machine, and your name and appointment time will appear on-screen, in katakana. Press the green button, which lets the maternity department know you’re in the building.
From the right-hand side of the machine, a buzzer will pop up, Star Trek style. Pop this into a handy holder to wear around your neck for the duration of your appointment. I’ve found that, as there are so many other bits and bobs to juggle, this strap – while not the most enchanting fashion statement – is a super practical accessory.
For whatever reason, a lot of the Japanese mums-to-be choose not to wear the holders.
Step 2. Arrival tasks – blood pressure and weight
Take an escalator or lift to the maternity department, on the third floor. There’s no need to let anyone know you’re there. I cheerily announced my arrival to the receptionists for the first 26 weeks or so; it took me a while to figure out why they were looking at me each time with mild disdain.
Go to the blood pressure machine room, behind the reception desk. Slide your arm into the machine, and press the big green button to start. About 10 seconds later, a paper reading will glide out. I regularly took two or three readings as my first was always ridiculously high, having just run from a meeting, or eaten a salt-laden business lunch.
(At 4 months, following a stressful work day, I got asked to re-take the reading, not once but twice, and was then made to feel by the doctor that if I wasn’t careful my head might explode!)
Write your name, as well as your weight from that morning, on the piece of paper.
Pick up a paper cup and write your name on that, too.
Step 3. T-time
Walk with your cup and piece of paper to the bathroom, and take a urine sample.
Leave the cup on top of a piece of paper at the little window beside the bathroom sinks, and an unseen hospital staff member will pick up both things.
Remember to wash your hands 🙂
Step 4. Wait
Walk, nay mosey, back into the third floor reception area – there really is no hurry – and wait for your buzzer to go off. This will indicate that the doctor is ALMOST ready to see you. The good news is that while you wait, you’re permitted to wander around the hospital, which has restaurants, a coffee shop, and some other stores.
After a while, the doctor’s room number will flash on your buzzer, which will at the same time vibrate and play an electro version of Twinkle Twinkle Little Star. Go and sit outside the designated room on the third floor and wait for your name to be called over the loudspeaker.
In the meantime, you can fill out out one of the health insurance vouchers given out by the local ward office when you registered your pregnancy, to cover the bulk of the appointment cost.
Step 5. See a human (doctor / midwife)
When your name and room number is called, knock on the door, and enter the doctor’s room. You’ll be asked to hand over your boshi techo and appointment voucher before lying on the bed, having some fundal measurements taken by a midwife, and then getting a scan. This is the most exciting 8 minutes of the 2.5 hour adventure.
The doctor will tell you the baby’s weight and other vital stats, confirm that the heartbeat is OK, and give you some nice ultrasound pics for the family album. He or she might also take this opportunity to lecture you about your weight gain (you are only permitted to gain a maximum of 10kg in Japan, for your entire pregnancy).
I’d recommend writing down in advance any questions you might have, since the speed of this step is so fast your head might reel and you’ll forget what you were doing there in the first place.
Step 6. Make another appointment

Walk back to the third floor reception area, put your doctor’s notes in the tray (see photo, right), and wait for your name to be called by another human being. When this happens, take your insurance card to the reception desk and prepare to set a date for your next appointment.
(In July, while 6 months pregnant, I sent the receptionists into a tailspin as I’d be flying to the UK for a summer holiday and therefore wouldn’t be able to attend an appointment for another 3.5 weeks. Quelle horreur! It took four staff 30 minutes to work out a conclusion – i.e. I could not be in two countries at once.)
I always requested the latest appointment of the day – starting at 3:30pm or 4:00pm – as this was easiest to fit around my work schedule, and seemed to guarantee the shortest waiting times. Even in Japan, staff and doctors want to get home at 5:00pm.
Step 7. Pay
Head back down to the first floor, insert your Nisseki card into the payment machines, and settle your bill by credit card or cash. If you’re not a fan of small change in your purse, a nifty tip is to use up your coins, as the machine accepts 1, 5, 10, 50 and 100 yen coins as well as all notes.
Finally, you’ll be issued with an A4-sized receipt which also includes details of your next appointment. I only figured this latter part out in the 9th month of pregnancy, and finally realised why, when plugging dates and times into my Android during Step 6, I was being given the death-stare by receptionists.
Easy when you know how
So, there you have it: an average of 2 hours, 2 human interactions, and a lot of nifty tech on each visit. The Nisseki system is not ideal when you’re in a hurry (i.e. working full-time) but certainly seems to work for handling mums-to-be, en masse.
How does Nisseki compare with your maternity hospital, in Japan or in another country? I’d genuinely love to hear . . .
More reading
Japan’s Red Cross Hospital (Nisseki)
Initial Visit: 8:30am to 3:30pm (Mon – Fri)
Return Visits: 7:50am to 3:30pm (Mon – Fri)

Leave a comment